
Do you want to learn how to add a paywall to your WordPress content?
Adding a paywall is a great way to monetize valuable content and create a sustainable revenue stream for your WordPress site. Whether you’re running a blog, news site, or membership platform, implementing a content restriction system can transform your WordPress site from a free resource into a profitable business.
ProfilePress offers one of the most user-friendly and flexible solutions for adding paywall functionality to your WordPress site. Unlike other complex plugins, ProfilePress provides an intuitive interface that allows you to restrict access to posts, pages, or custom content with just a few clicks.
In this guide, you will learn the fundamentals of paywalls, get an introduction to ProfilePress, and discover why it is the right choice for your WordPress site. We will walk you through installing and activating ProfilePress, setting up paid memberships, and configuring hard, soft, and metered paywalls.
By the end of this tutorial, you’ll have a professional paywall system in place that encourages visitors to subscribe for exclusive access to your content.
Understanding Content Paywalls
Before we get into the nuts and bolts of setting up your paywall, let’s clear up a couple of important questions: What exactly is a paywall, and how does ProfilePress help you achieve this?
What is a Paywall?
A paywall is a barrier restricting access to certain content on your website. Think of it as a highway toll gate—before you enjoy the scenery, you must pay a toll.
This strategy has been widely adopted by online publications, bloggers, and educators who want to monetize exclusive content without compromising free access to general information.
Types of Paywalls
Website owners can use several types of paywalls to restrict access to content while generating revenue. Each type offers a different level of access control and is suited for different business models. Here are the most common types:
Hard Paywall: This type of paywall completely restricts content access unless users purchase a subscription or membership.
Metered Paywall: Allows users to view a set number of articles or content pieces for free within a given timeframe. Once they reach the limit, they must subscribe or pay to continue accessing content.
Soft Paywall: Provides a mix of free and premium content. Users can read basic content at no cost but need to subscribe or pay for in-depth or exclusive material.
Hybrid Paywall: A hybrid paywall combines multiple paywall types to create a flexible monetization strategy. For instance, a site might use a metered paywall for blog posts while keeping premium reports behind a hard paywall.
What is ProfilePress?
ProfilePress is a widely used WordPress membership plugin. Over 200,000 websites trust it to manage memberships and content access. It enables you to create membership sites easily, sell digital products, and restrict content.
With ProfilePress, you can add a paywall to WordPress content, ensuring only subscribed members can access premium materials. The plugin supports unlimited membership levels with customizable features, allowing you to set up flexible pricing plans, including free, one-time, and recurring payment options.
Main Features of ProfilePress
- Content Restriction: ProfilePress allows you to control access to specific pages, posts, categories, tags, custom post types, videos, and more.
- Multiple Payment Methods: Accept both one-time and recurring payments through Stripe, PayPal, Razorpay, Paystack, Direct Bank Transfer, and Mollie.
- Optimized Checkout Experience: Use high-converting checkout forms to boost sales and membership sign-ups.
- Discounts & Promotions: ProfilePress allows you to create and manage discount codes and special offers to attract and retain subscribers.
- Member Directories: Build searchable member directories with advanced filtering options for better networking.
- Seamless Course Integration: Compatible with LearnDash, Sensei LMS, LifterLMS, and Tutor LMS for selling online courses.
- Easy Registration & Login: ProfilePress allows social login for quick access and supports passwordless authentication.
- User Approval Management: Manually review and approve new users before granting access.
- Automated Tax & VAT Handling: Calculate and apply taxes automatically based on customer billing details.
- Analytics & Reports: ProfilePress provides insightful reports and visual analytics to track membership and revenue growth.
- Pre-Designed Form Templates: Use professional templates for login, registration, password reset, and profile editing forms.
- Custom User Fields: Collect additional user details with flexible custom field options.
- Fraud & Spam Protection: ProfilePress prevents spam and unauthorized access on registration, login, and checkout pages with built-in security features.
Adding Paywalls To WordPress Content
To get started, you need to install the ProfilePress plugin. First, obtain a copy of ProfilePress here. After purchasing, you’ll receive an email containing the downloadable ZIP file and your license key.
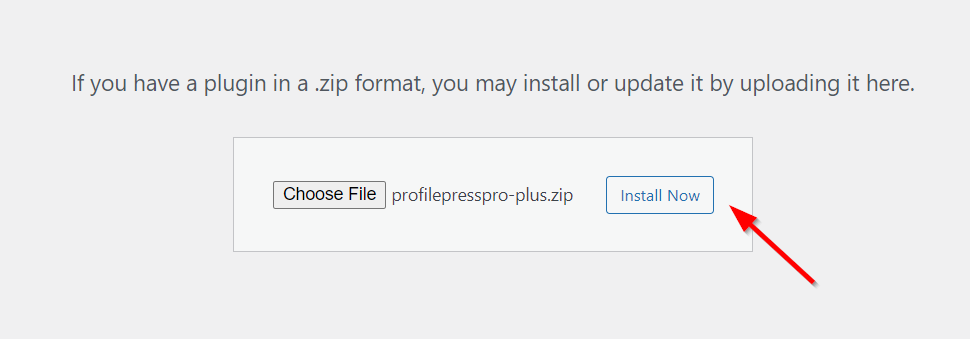
Download the file, then log in to your WordPress admin dashboard. Navigate to Plugins > Add New > Upload Plugin, select the ZIP file, and click Install Now to proceed.
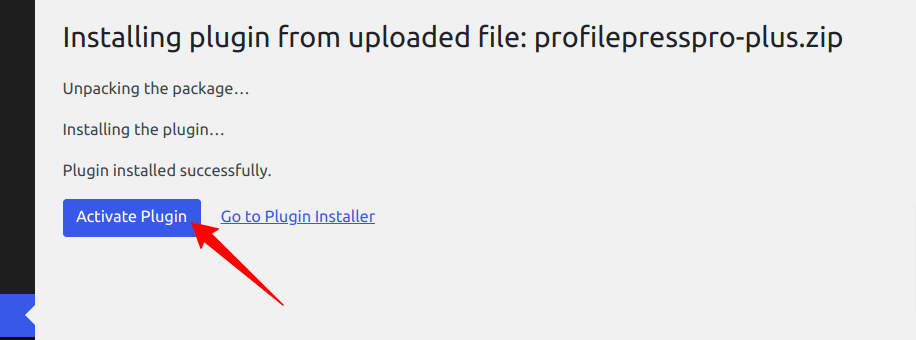
Once the installation is complete, click the Activate Plugin button.
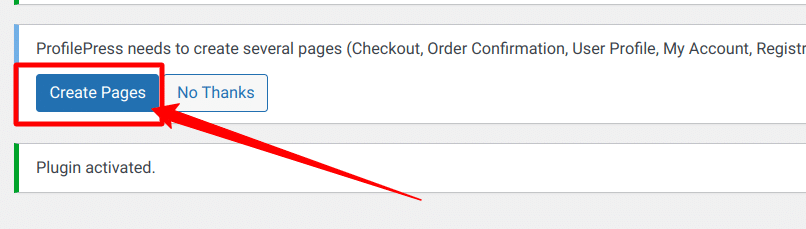
A notification will appear at the top of the page stating, “ProfilePress needs to create several pages.” Click the Create Pages button to complete the plugin setup.
Set up Paid Memberships
Membership structures are crucial in a paywall system. They determine who can access what content. Here’s how you can set them up:
Go to ProfilePress >> Membership Plans to create a new membership plan
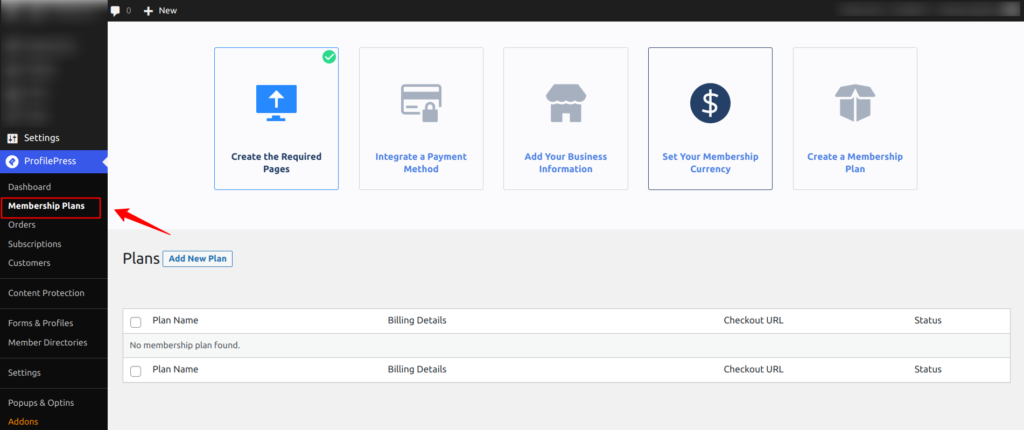
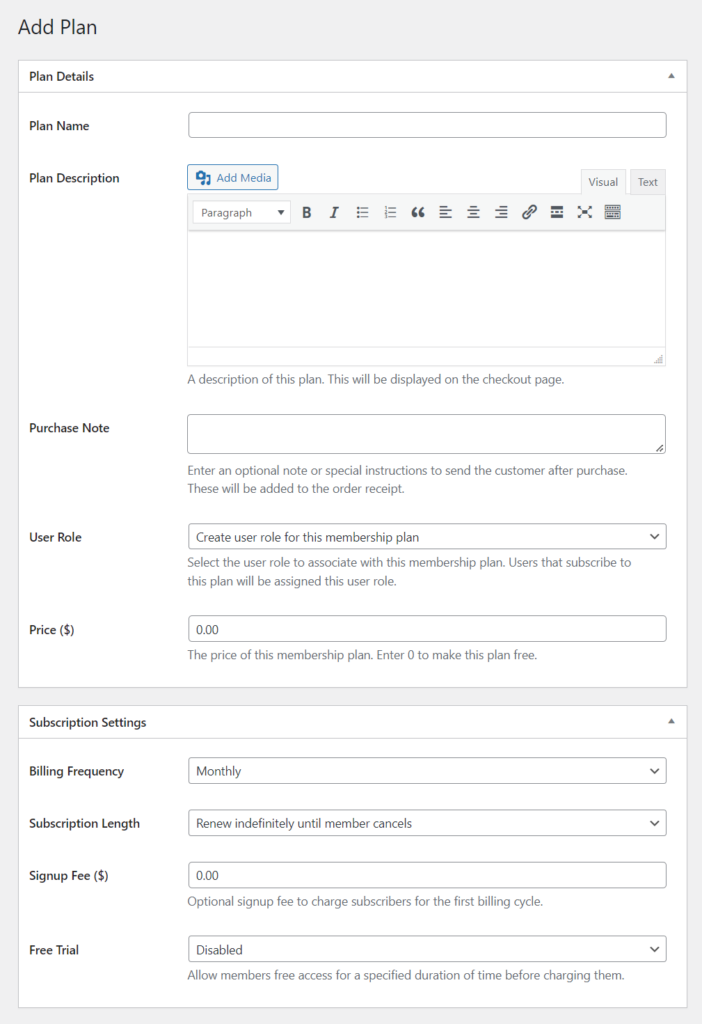
Click the Add New Plan button to navigate to the plan creation page. Here, you can configure the details of your membership plan. Enter the required information, then set the price, subscription duration, and billing frequency.
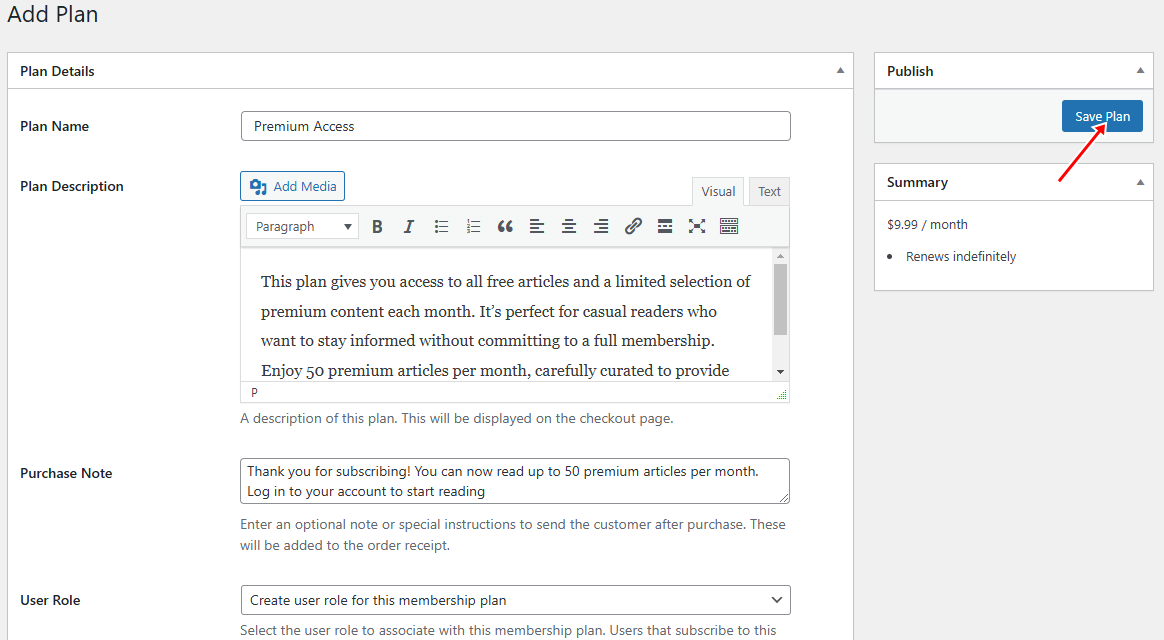
After editing your membership plan, click Save Plan to apply your changes.
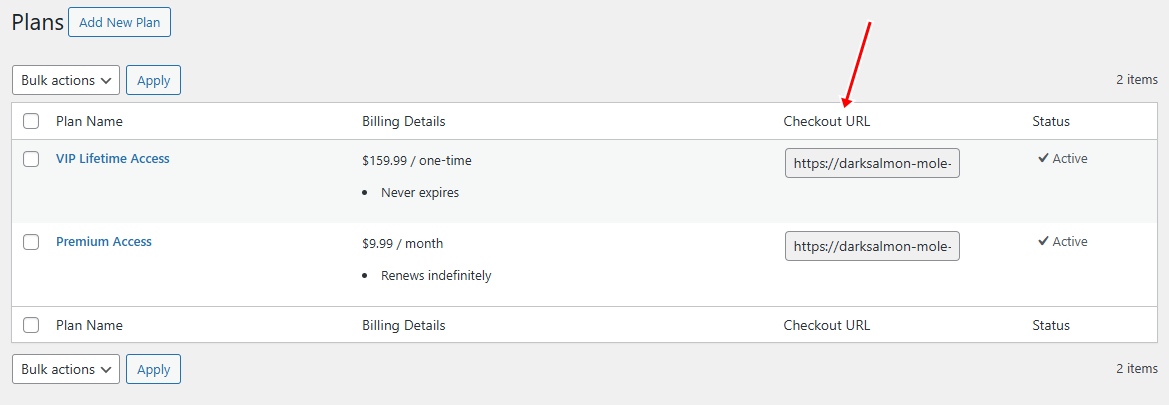
Each membership plan includes a unique checkout link that you can add to your website’s pricing page or share via email, making it easy for users to subscribe.
To find the checkout link for your plan, go to ProfilePress > Membership Plans—the link will be listed alongside the membership plan you created.
Integrating Payment Gateways
ProfilePress integrates with several popular payment gateways, including Stripe, PayPal, Razorpay, Paystack, Direct Bank Transfer, and Mollie, making managing subscriptions and one-time payments simple.
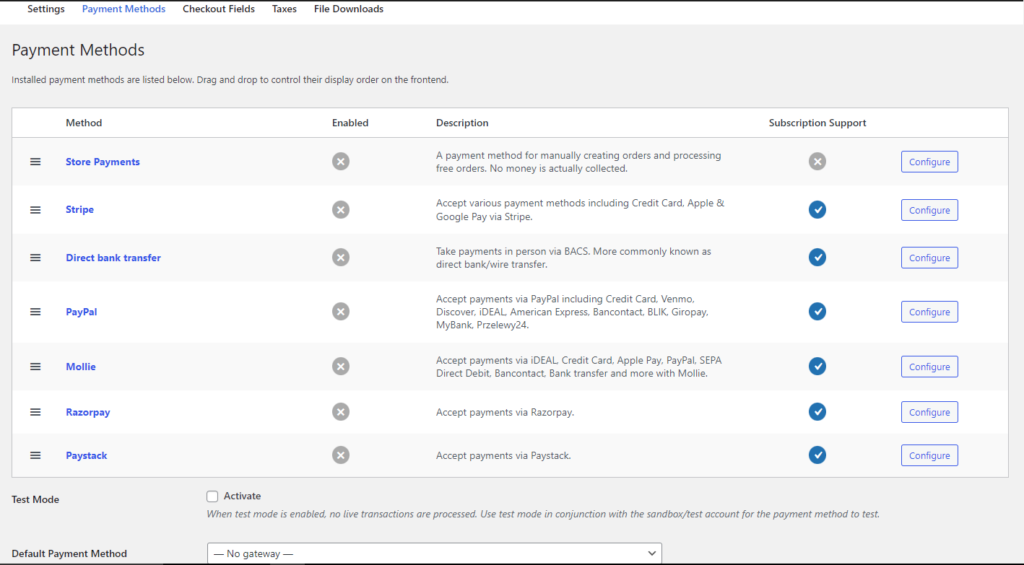
To start accepting payments, go to your WordPress dashboard and navigate to ProfilePress > Settings > Payments > Payment Methods.
Next, enable your preferred payment gateways and connect your account by entering the required API keys or login credentials.
Once configured, click Save Changes to apply your settings and begin collecting payments.
Adding Hard, Soft, & Metered Paywalls to WordPress Content
ProfilePress plugin allows you to set up hard, soft, and metered paywalls to control content access.
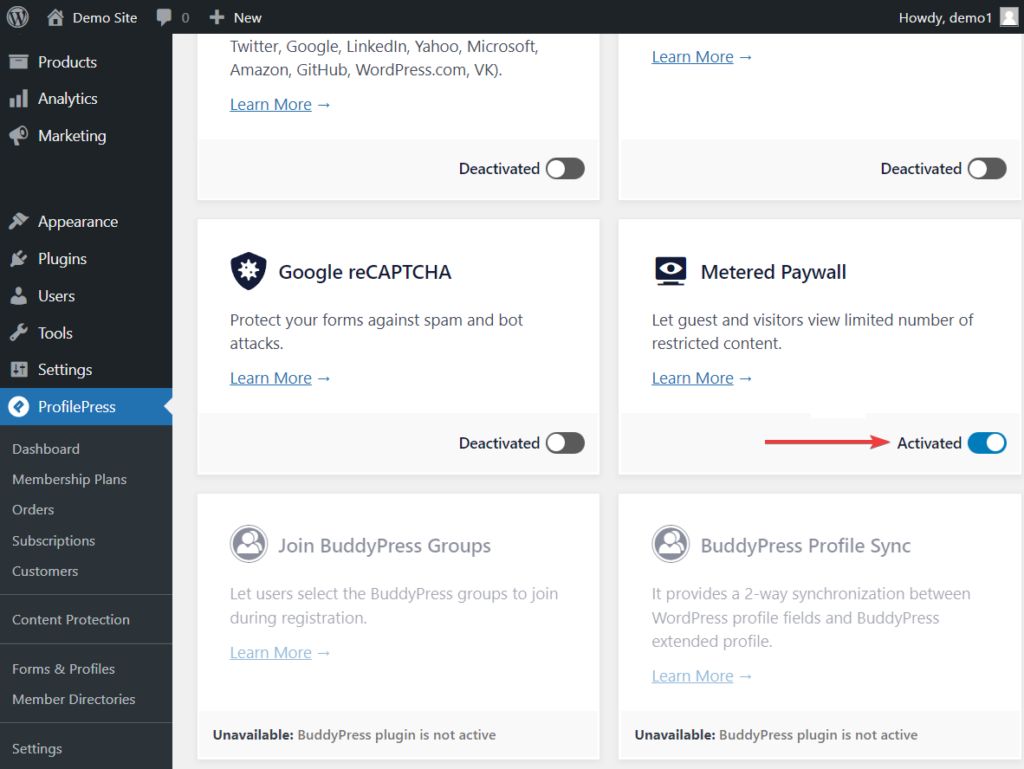
To get started, enable the Metered Paywall addon by navigating to ProfilePress > Addons and toggling the Activate button.
Setting Up a Hard Paywall
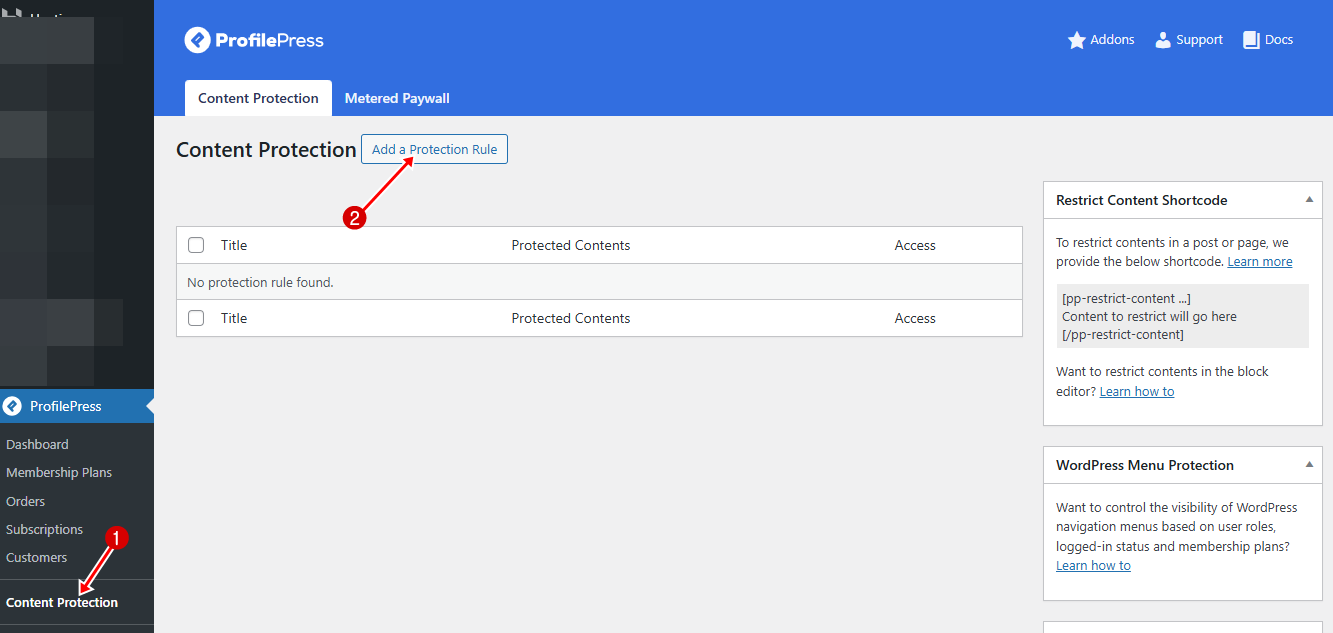
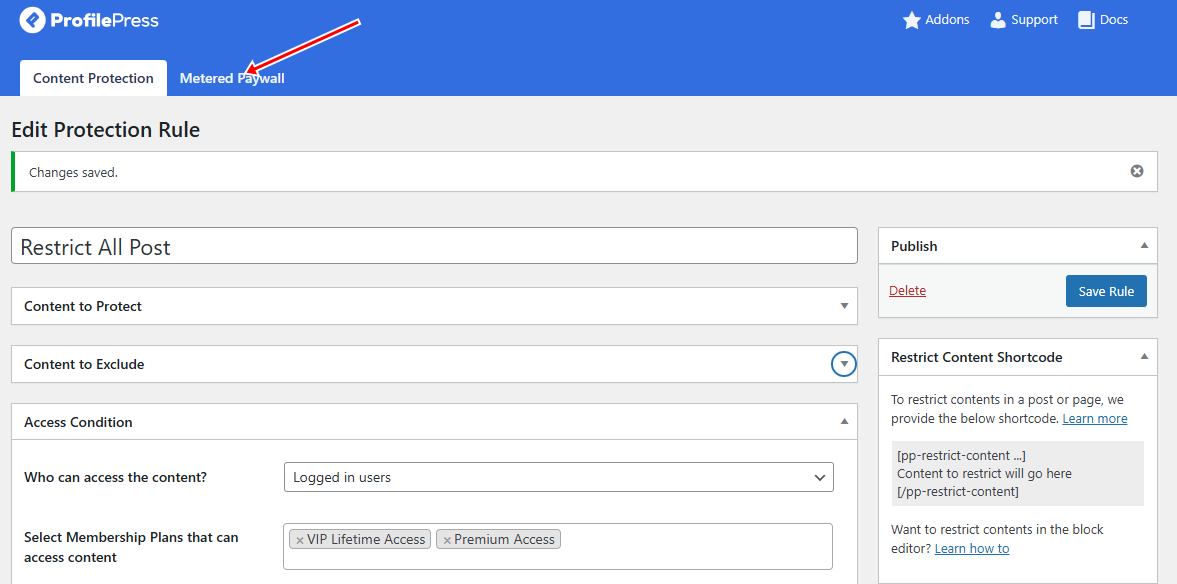
To create a hard paywall, navigate to ProfilePress > Content Protection and click Add a New Protection Rule to define access restrictions.
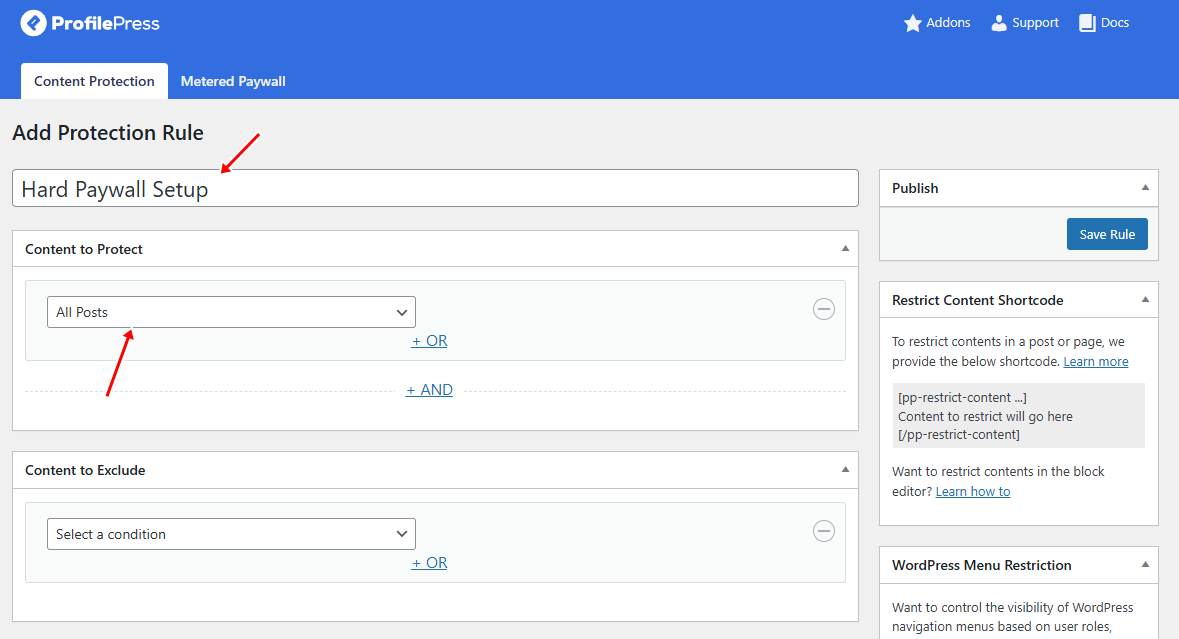
On the next page, enter a title and select “All Posts” from the dropdown menu under the “Content to Protect” section.
You can also restrict access to specific custom post types, posts within certain categories or taxonomies, and more.
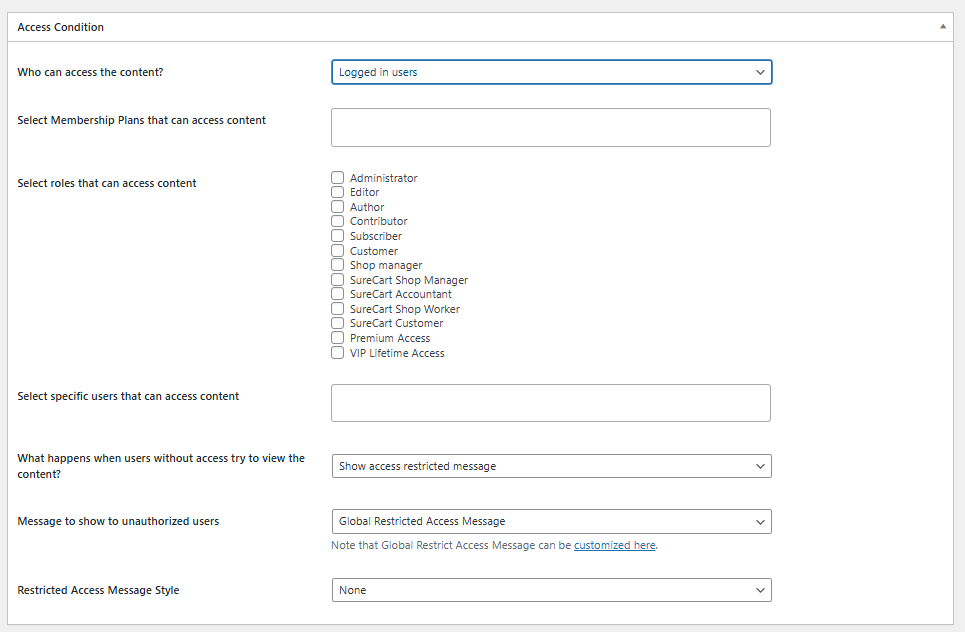
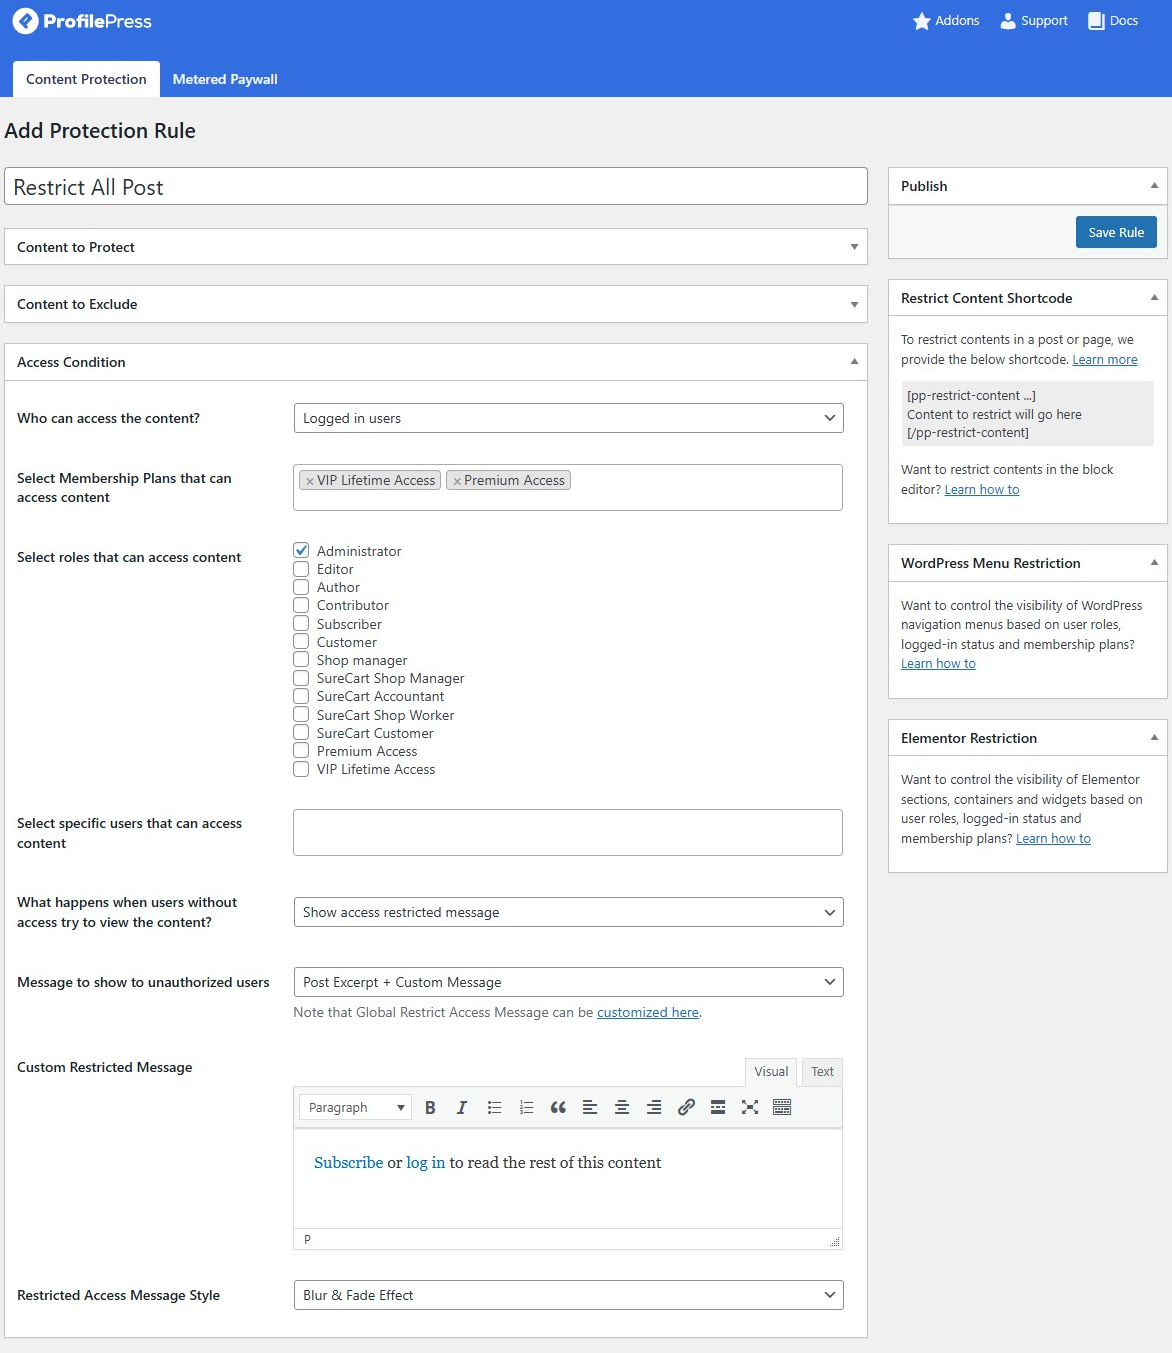
 Scroll down to the Access Condition section and, from the dropdown menu next to “Who Can Access the Content,” select Logged-in user.

After selecting Logged-in users, additional options will appear in the Access Condition section.
Start by adding the membership plan you created in the previous step to the Select Membership Plans That Can Access Content field.
Additionally, you can grant access to other user roles beyond paid subscribers, such as Administrator or Editor, if needed.
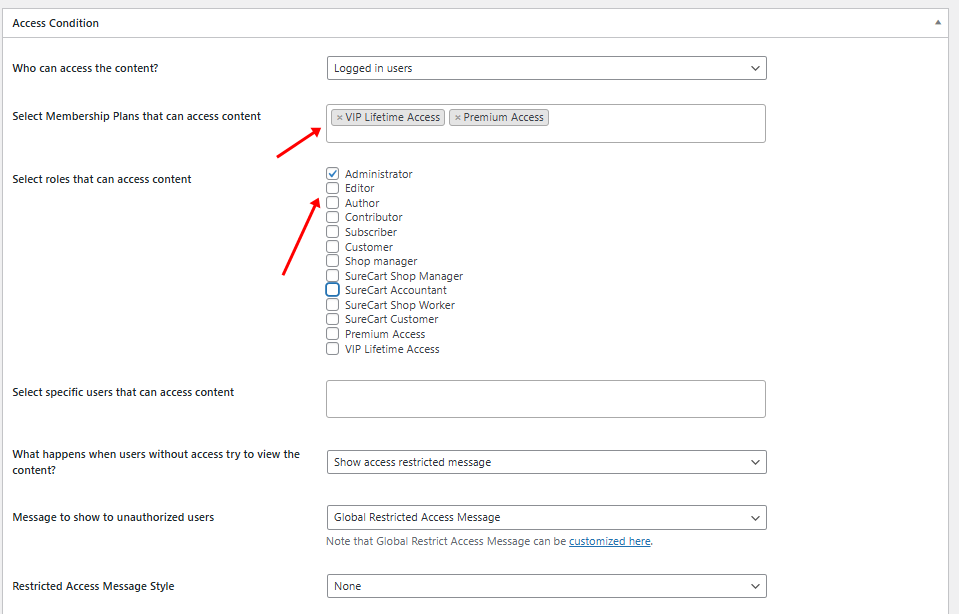
Tip: No matter which user roles you grant access to, be sure to include Administrators so they can manage and view all site content.
Next, go to the Restricted Access Message Style option and select Blur & Fade Effect from the dropdown menu.
Then, under Message to Show to Unauthorized Users, choose Post Excerpt + Global Restricted Access Message.
When done, click Save Rule to apply your settings.
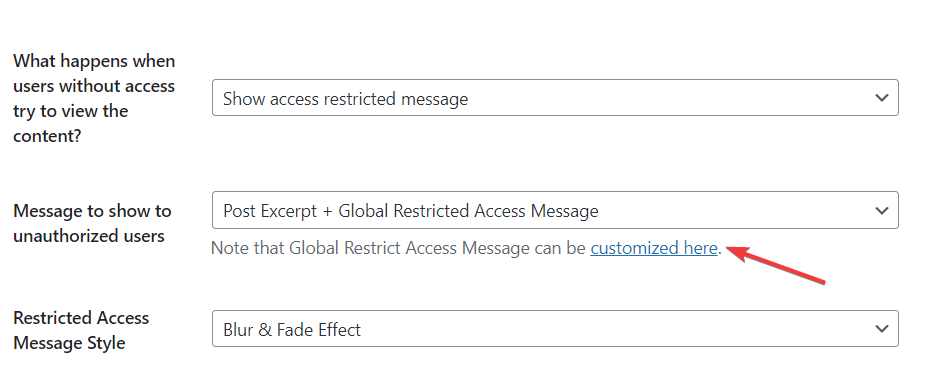
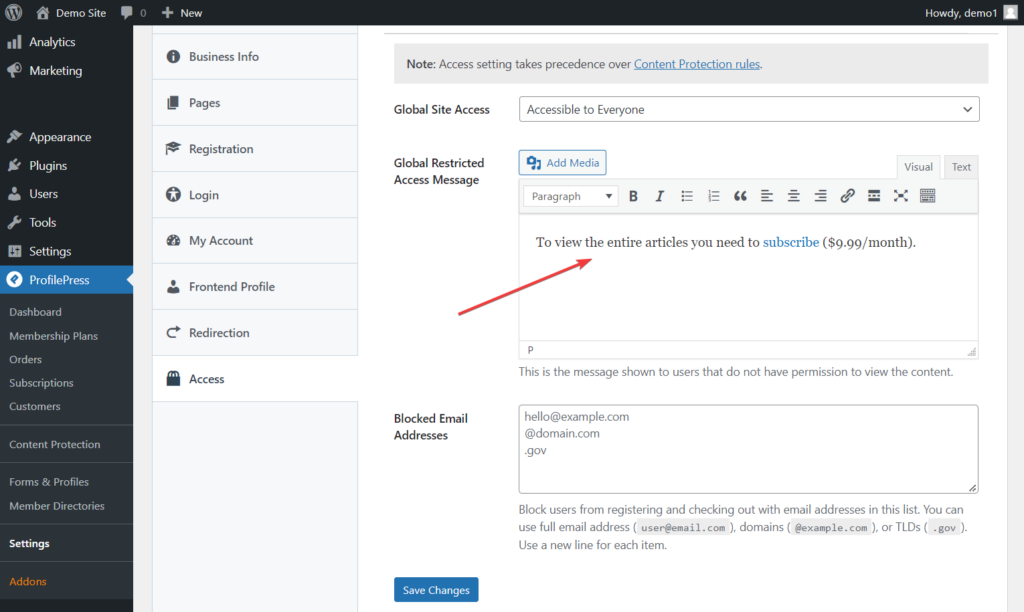
You can click on the customized here link to add a custom message informing visitors that a subscription is required to access the full article.
Be sure to include the checkout or pricing page URL so visitors can easily subscribe and complete their payment.
Alternatively, you can select Post Excerpt + Custom Message if you prefer to display a customized message instead of the default restricted access message.
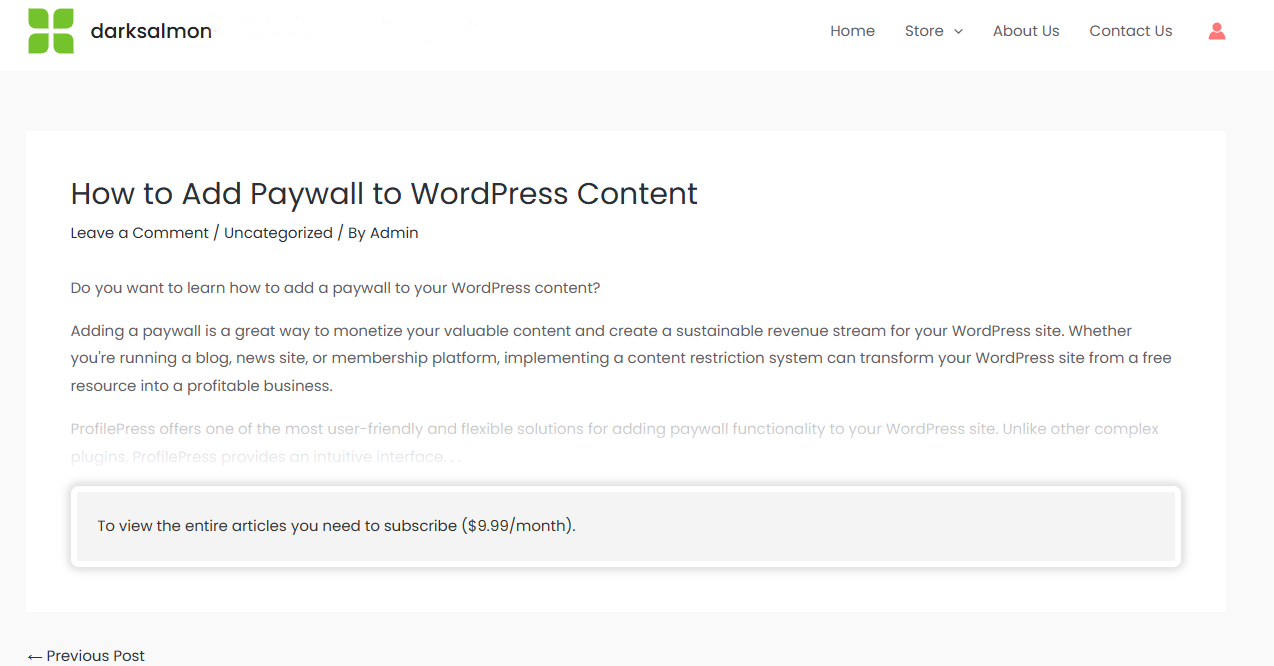
Now, visitors can only view post excerpts or a limited portion of each article. To gain full access, they must subscribe to a membership plan.
Below is an image showing the Hard Paywall in action.
Setting Up a Soft Paywall
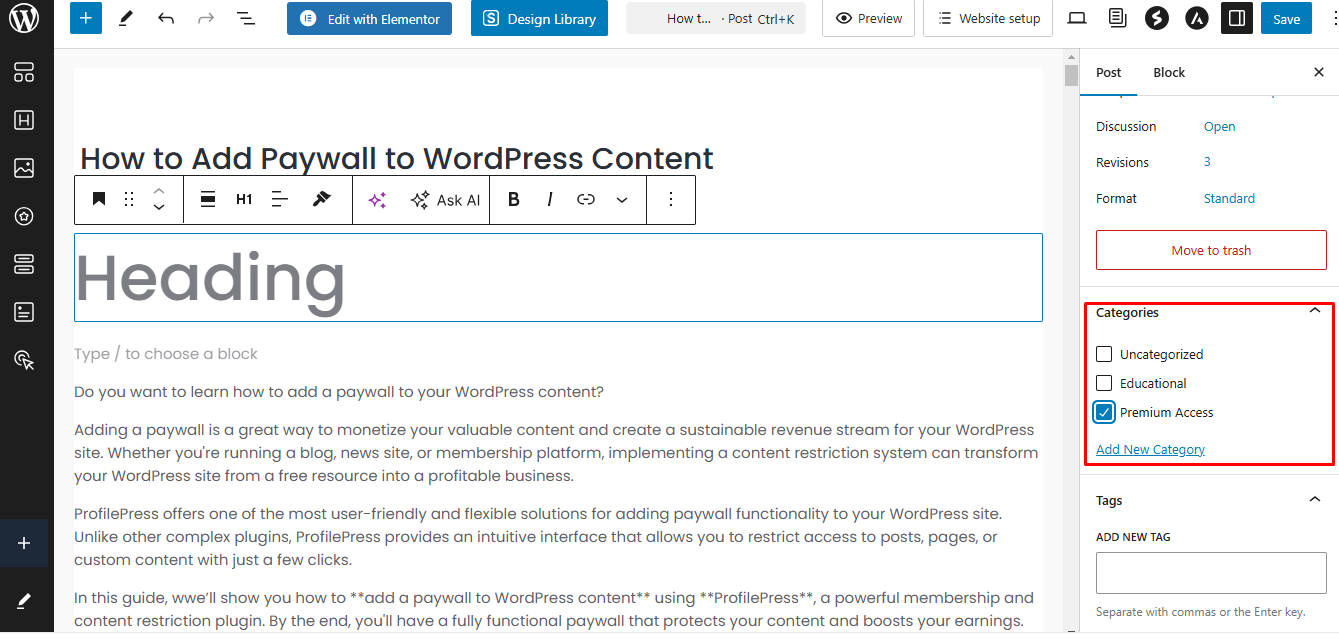
To set up a soft paywall on your WordPress website, start by distinguishing premium content from free content. You can do this by tagging premium content as paid or premium or using categories instead.
To categorize content, open the post or page in the WordPress editor, navigate to the category section, and select a category.
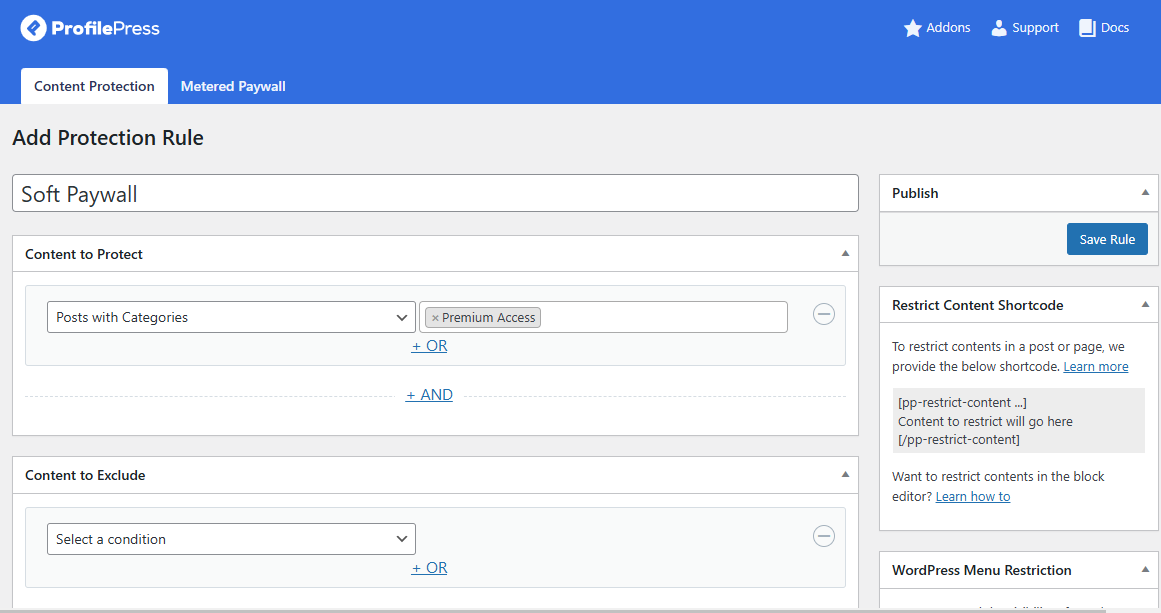
Next, navigate to ProfilePress > Content Protection and click Add a New Protection Rule.
On the next page, enter a title and, under Content to Protect, select Posts with Categories
A search box will appear—enter the category you just created, select it.
Then, navigate to the Access Condition section to define who can view premium content. This could include members with an active subscription to specific membership plans.
Since this process was covered earlier in the hard paywall setup, we won’t repeat the steps here.
Once configured, all posts categorized as premium access will be accessible only to paid subscribers or selected user roles, while the rest of the content remains freely available.
Setting up a Metered Paywall
To configure a metered paywall on your WordPress website using the ProfilePress plugin, follow these four essential steps: first, restrict content; second, set up the metered paywall; third, prevent paywall abuse; and finally, add a countdown slider.
Let’s go through each step in detail.
Restrict Content
Begin by restricting your WordPress site’s content using the steps outlined in the Hard Paywall setup section.
When done, click the Save Rule button. Then proceed to the second step by opening the Metered Paywall settings beside the Content Protection menu at the top.
Setting Up a Metered Paywall
To configure your metered paywall, you’ll need to adjust three key settings on the Metered Paywall page:
- Reset Limitation After: Set the duration before restrictions reset, allowing visitors to regain access to free content.
- Restrictions: Choose which post types to restrict and specify how many posts, pages, or custom post types can be accessed for free.
- Total Free Views: Define the maximum number of posts visitors can read before encountering the paywall. This global limit overrides individual post-type restrictions.
Once you’ve configured these settings, click Save Changes to apply them.

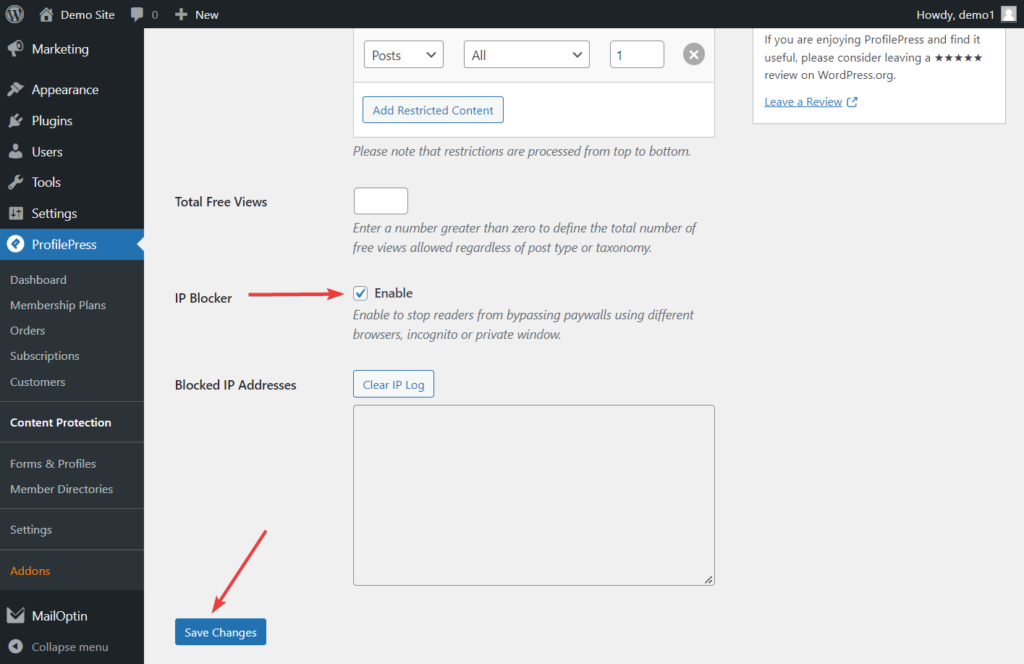
Preventing Abuse of Paywalls
After setting up the metered paywall, preventing unauthorized access through incognito browsing is essential.
To do this, enable the IP Blocker feature by navigating to Metered Paywall > IP Blocker, selecting the Enable option, and clicking Save Changes.
This will help protect premium content from users attempting to bypass the paywall.
Adding a Countdown Slider
A countdown slider is an effective way to encourage visitors to subscribe, similar to how platforms like The New York Times and Medium limit free article views while displaying a countdown. This feature informs users of the remaining free views before requiring a subscription.
To add a countdown slider, go to Metered Paywall in your WordPress dashboard and navigate to the Countdown Slidebox section.
Enable the feature by selecting Enable, then enter the link to your checkout or pricing page in the Button-Link field. This ensures visitors can easily navigate to the payment page when their free views run out.
Additionally, you can customize the message, button text, and log-in text.
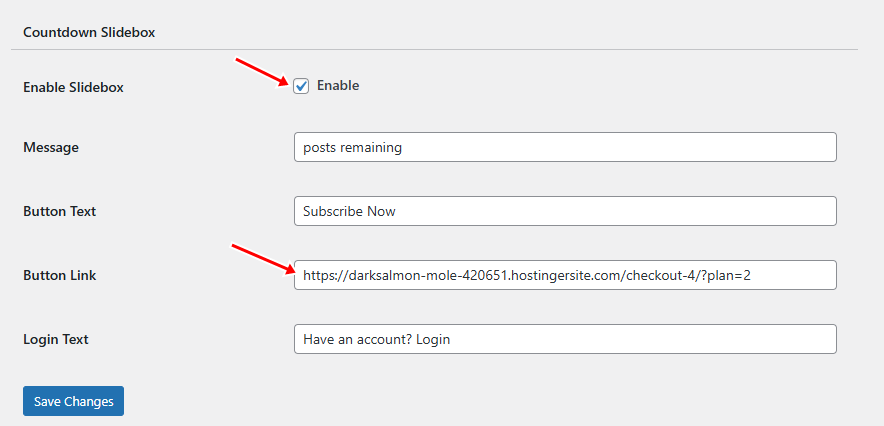
When you’re finished, click the Save Changes button. The countdown slider will then be automatically added to your WordPress site.
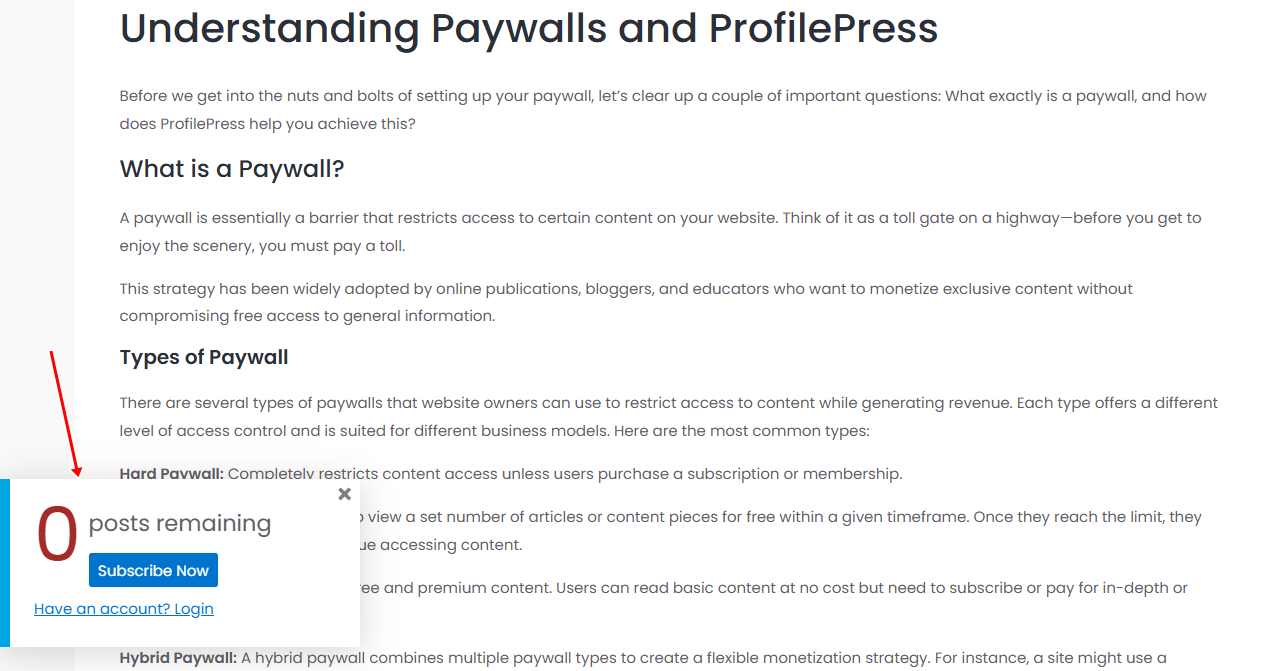
By adding a countdown slider through the Metered Paywall option, you’re adopting a proven paywall strategy and enhancing the user experience with a clear, engaging prompt that encourages subscriptions.
And that’s it! You can now set up various types of paywalls on your WordPress website.
Conclusion
Adding a paywall to your WordPress content is an excellent way to boost your website’s revenue, cultivate a dedicated subscriber base, and establish a sustainable business model for your online content.
Following the steps outlined in this guide, you’ve learned how to effectively use ProfilePress to create a professional content restriction system that can elevate your website’s monetization potential.
