
When you are trying to create a WordPress site that perfectly fits your needs and wants, you need to keep an eye on quite a few things at the same time. However, you should especially focus on one thing. Your website’s menu. The menu is definitely a key feature of sites, and it can easily make or break them as far as both visual presentation and overall functionality and efficiency go. So, it’s very important that you highlight it, to make it easier for your visitors to navigate through your site. Whether your visitors are using a desktop or a mobile device. Well, you’re in luck because there’s a plugin that can help you out with that.
Sticky Menu & Sticky Header is a completely free plugin with which you can turn any element you would like into a sticky one. In less than a single minute, at that. The plugin can boast its user interface, which is very user-friendly and intuitive. The menu of the WP Sticky plugin presents you with the option to turn any element sticky almost instantly as it reaches the top of the page upon any of your visitors scrolling down your site.
This is regularly used to make menus stay at the very top of your page and create menus that “float”. But, this plugin lets you make absolutely any element sticky, which includes headers, menus, logos, widgets, calls to action, or floating menus. That’s a lot of various elements you can take care of in a jiffy. All you have to understand is how to pick the right selector for the element you would like to make sticky.
There are simple selectors such as “nav”, “#main-menu” and “.menu-main-menu-1”. But, there are also a bit more complicated and specific ones like “header > ul:first-child” or “nav.top .menu-header ul.main”. That bit is easy if you can code. The plugin makes it possible for you to simply pick a menu element and add it to the plugin, though. This automatically and instantly makes it sticky.
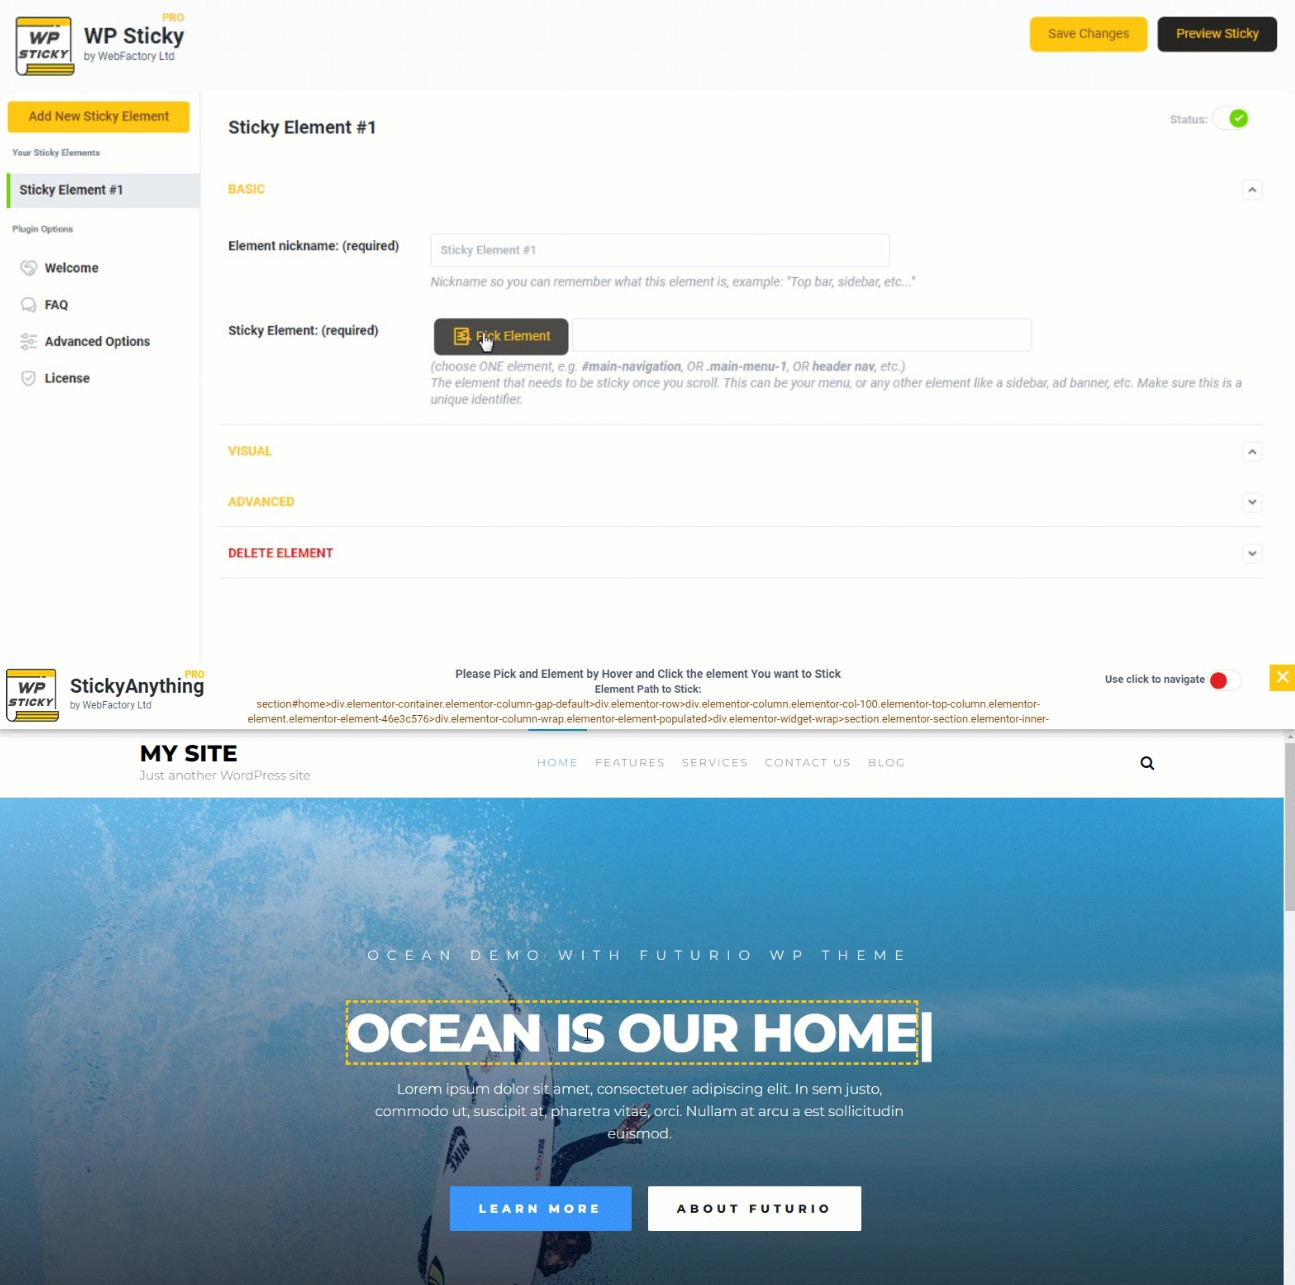
However, you can bypass any coding, just use the PRO version of WP Sticky, which provides you with a visual element picker. With the premium version, the whole process of creating sticky elements is laughably simple to use, meaning you do not have to have any special skills or experience. Messing with any code is out of the question, as well.
The one thing you have to do is use the plugin’s element picker to settle on the element you want to make sticky. You can make as many elements sticky as you would like, as the number is limitless. Not to mention each element can be set up individually as well since the settings are all distinct.
WP Sticky is completely compatible with all plugins, themes, and page builders. So, don’t worry about it breaking any other of your WordPress tools and services. Mobile users that usually get annoyed by sticky elements popping up on a website won’t have any problems if this plugin is used, either.
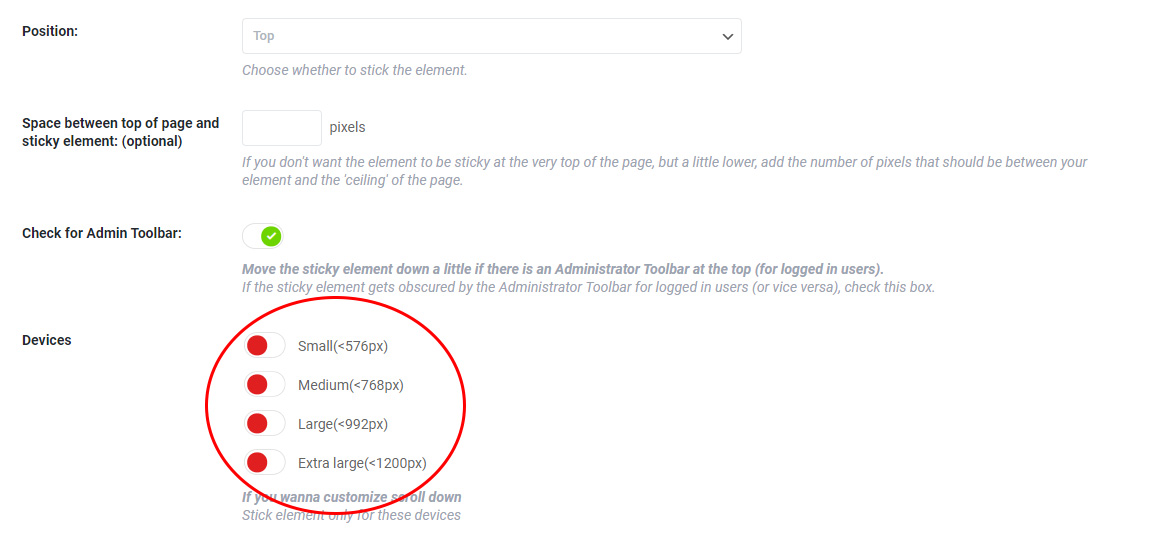
That’s because you can handpick the devices on which certain elements (or all of them) are sticky, which means you can just get turn off some of them to make it way easier for mobile users to navigate your site.
As mentioned before, the plugin is very simple and easy to use. But, if you do come across some problems, or have any questions at all, the plugin team’s support team is very much at your service. They are the same people who built the plugin, so they definitely know what they are talking about, and will solve any issue you might have with it quickly and efficiently.
Let’s give an example of how to create a sticky menu or header, which the plugin is frequently used for. A sticky header created with WP Sticky fixes the logo, menu, and background together.
Just make a new sticky element by giving it a name, clicking the “pick element” option, selecting the whole header, and saving the changes. It’s as easy as that. Also, a tip, by giving the element a name, it makes it easy for you to help spot it later on when you have a bunch of active and inactive sticky elements.
The premium version of the plugin allows for the creation of multiple sticky elements, too. For example, let’s say you want to create 2 sticky elements at the same time. Give them their names, and click the “pick element” button for each individual element. Select the widget and the title. Type 270 into the “Space between the top of the page and sticky element: (optional)” option found under Visual settings to get a sticky widget. Save the changes, and that’s it, you’re done. Of course, that’s just the tip of the iceberg as the premium version offers way more features in general.
Conclusion
WP Sticky is an excellent plugin to help you create absolutely any element of your page sticky in just a few moments of your time. You don’t even have to know how to code or anything if you get the premium version of the plugin. Not to mention it gets you a whole lot of other features, too. Make your website more visually appealing, but without making the mobile users’ lives harder. Everything sticky-related is made easy with the WP Sticky plugin.
