
Export, Import & Reset Settings
Sometimes, you will need to reinstall the plugin or maybe even transfer the entire website. In cases where you would have to delete the plugin and lose settings, WP Maintenance has got you covered.
Also, in case you need a fresh start, you don’t have to manually bring each and every option back. You can just reset settings and everything will be exactly as it was after you installed the plugin for the first time.
Export Settings
To export settings, please:
- Click on the WP Maintenance from the admin menu,
- Open “Advanced” settings,
- Click on the “Export Settings” button.
The plugin will generate a text document with a unique name and date of creation. You will need this file when you decide to import settings back to the plugin (on the same or new domain).
All settings are exported except license details. You can safely transfer (export and then import) settings between different domains/sites.
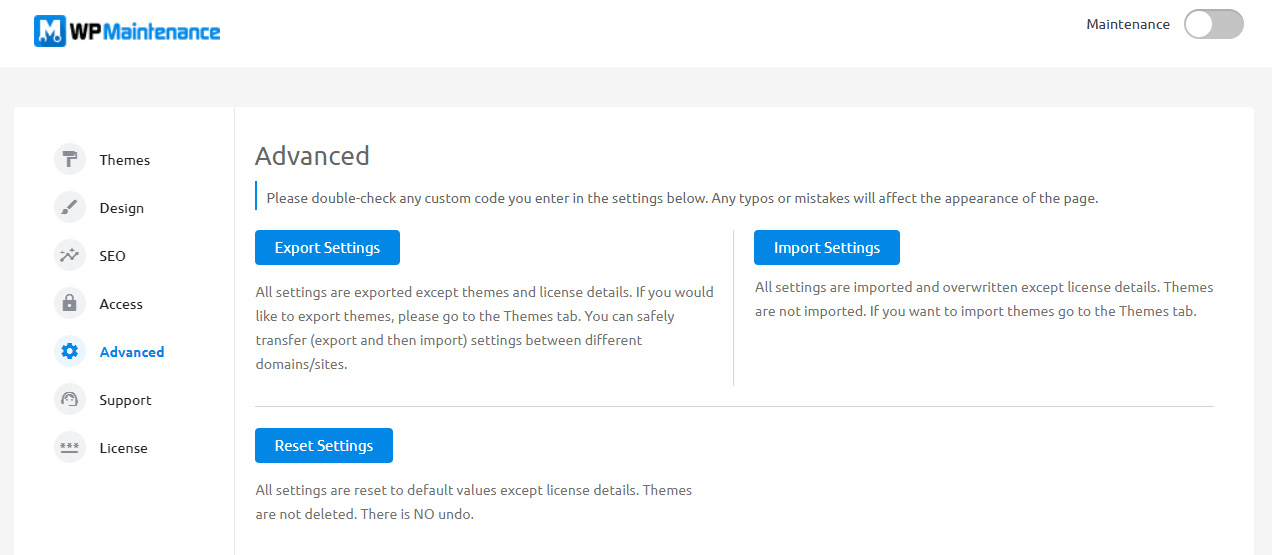
Import Settings
When you decide to import settings, please:
- Click on the WP Maintenance from the admin menu,
- Open the “Advanced” tab,
- Choose the “Import Settings” button,
- Click the “Choose file” button and search for an export file (ie: maintenance_pro_settings_2022-05-18_12_49_52),
- Select the file and click the “Import Settings” blue button.
All settings are imported and overwritten except for the license details.
Reset Settings
If you would like a fresh start, you can simply reset settings. Just navigate to the Advanced settings and scroll all the way down. Click the “Reset Settings” button.
Please note that by clicking the button, you will revert all settings (except license details) to their default values. There is no undo. If you need more resetting options, check out the WP Reset plugin which offers much more when it comes to resetting sites.
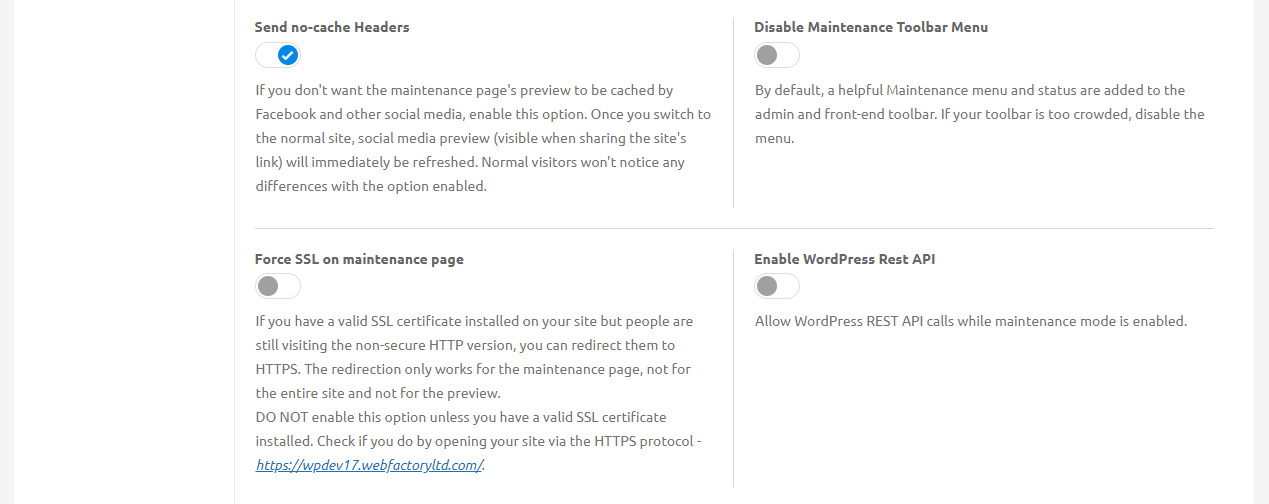
Send no-cache Headers
When you start working on your maintenance page, Facebook and other social media sites will create a custom preview when this page is shared via social media services. If you would like to avoid this, turn on the “Send no-cache Headers” option.
Normal visitors won’t notice any differences with the option enabled.
Disable Maintenance Toolbar Menu
When you install the plugin, it will create an icon on your WordPress toolbar (a bar on top of the screen that’s usually visible while you’re logged in). This icon will always show the status of your maintenance page, as well as hold a few important links you will need when working with a maintenance page.
If you do not need the icon, you can quickly remove it by turning on the “Disable Maintenance Toolbar Menu” option from the Advanced settings.
Force SSL on Maintenance Page
Sometimes, even when you have a valid SSL certificate, people may still land on the insecure version. By enabling this option, you can redirect people to the secure version (https) of your maintenance page. The redirection only works for the maintenance page; not for the entire site and not for the preview.
DO NOT enable this option unless you have a valid SSL certificate installed. Check if you do by opening your site via the HTTPS protocol – https://www.site.com/
If you would like more control over SSL, make sure to check out the WP Force SSL plugin.
Enable WordPress Rest API
Allow WordPress REST API calls while Maintenance mode is enabled.
When updating WordPress, themes, or plugins, your site becomes unavailable for a short period of time. Instead of showing errors, WordPress prepares a simple maintenance page telling people that the update is underway.
If you want to write a custom message for this purpose, turn on the feature, and quickly edit the maintenance content.
How to Overwrite WordPress Default Maintenance Page?
- Go to Maintenance PRO,
- Open the “Advanced” tab,
- Scroll down and click on the icon,
- Write the title & content of your new maintenance page,
- Save changes.
Now, if someone stumbles upon your site while you’re doing quick updates, the new page will be shown instead of the default one.